Showing posts with label Tutorial. Show all posts

Wednesday, January 4

Cake Pops, A Tutorial Of Sorts

I already posted pictures from my first batch and my latest batch (which was about three attempts later) here. I must have seen and read enough things about cake pops on the internet since their the "new" cupcakes for this year.

If you haven't already heard about them, essentially you make a large rectangle cake, let it completely cool, smash it up into tiny crumbs, and then mush it all together with a can of frosting to get a sticky sweet dough. From this point it varies, but you roll the dough into small balls, put lollipop sticks into them, and dip them into some baking chocolate or candy coating. You can also dip into sprinkles of your choice or let them cool and harden to decorate them with more frosting or other cake and/or candy decorating tricks.

That was a little too much prep for me given the time and space constraints I was under, so I chalked it up to my "to-do-someday-in-the-far-future" list. That list is like an encyclopedia set of nonsense. :D Slowly but surely, I do accomplish things from it! That was until I saw a recipe that... I think it comes from Pampered Chef. Oreo truffles.

Imagine those chocolate cookies crushed and then mixed into a dough using cream cheese. Then following the rest of the steps above. They are rich no-bake goodness. I have a strong sugar tolerance that not many share, but I know that the cake mix and frosting can be very overwhelming. There's something about the cream cheese that cuts down the sweetness of the cookies while keeping a very delicious full flavor. It's one package of cream cheese (about the size of two sticks of butter) per package of Oreo cookies.

Why am I going over all of this now? Well, I was hired to make another batch for a retirement party this Friday so I'm at it again. This time, I have my methods down pat! Well, as "pat" as they are going to get for a while, lol.

Some tricks/tips/things that I learned:
1. If you don't like chocolate or cream cheese, I have tasted the vanilla Oreo cookies with peanut butter. Very delish as well!

2. Food processor. Use a big one if you have it. I went and bought one for this task and I am in love.

3. I crush up one row of cookies first then add one-third of the package of cream cheese until the mixture rolls into a ball on its own. This seems to be a pretty good way of avoiding getting chunks of cream or cookies left in the dough.

4. I also bought a 1-inch scoop to help me keep better consistency in size. It's also good for scooping melons and such!

5. Make room in your freezer. They colder they are (I left them in a freezer bag overnight and they didn't freeze at all), the easier they are to manipulate without falling apart. If you need to pause to go grab a few more supplies- stick them in the freezer, heat up something- stick them in the freezer, or clean up a little bit to make some room- stick them in the freezer! You get the idea. It's so sad when it falls apart... even if that means you can eat that one. :P

6.Some people dip the stick (you can get them at a big chain craft store as well as individual wrapping baggies) into the melted candy coating and then into the cold balls of dough. They feel that it helps keep them in. I've done it, but I'm not entirely convinced that it helped.

7. I did end up using the whole bag of Wilton's candy melts so I would have a deep enough dipping supply.

8. I had a wooden spoon handy in case I needed to fish anything out, but getting the melts warm enough that it's as close to a very liquid consistency as possible is important. That meant sticking my wax/parchment paper-covered cookie tray with the dough back into the freezer as I heated up the candy coating in the double boiler again.

9. I'd use the spoon to scoop a pile to one side of the pot, grabbed the pop by the stick and quickly swish it from side to side to cover it in candy, and then twirled and gently tapped to get the extra coating off. It's so important to have the pops cold before this step since the coating warms it significantly. The pop can fall apart into your candy at this point if it gets too warm! So tragic and messy.

10. After dipping and getting as much excess off as I felt comfortable doing, I'd put the pop back on the tray and repeat the process with two to three more. This gives the newly coated pops some time to start hardening but are still wet enough for me to dip in my small prepared bowl of sprinkles. The tiny spherical ones seem to look the best for me so far. Nonpareils. By letting them start to dry just a little before sprinkles prevents the coating from pooling over and covering the pretty decoration. That was a big problem with my first batch because I dip the pops into sprinkles right after coating them.

They do fine sitting in the freezer for however long you need them to wait for you. It doesn't take very long for them to completely harden in there, about ten minutes. I keep them in the refrigerator after I've individually wrapped them in baggies. It's a relatively cheap treat to make that many can enjoy. If I have more than one flavor in the batch, I try to either use a different color candy coating or sprinkles or both.

There's plenty of other little things I do because it works for me. Let me know if you have any other tips or questions about my methods. I'll be happy to help!

Friday, September 3

185. Supposed To Be

Today was supposed to be an easy day! Well, straightforward. I was going to volunteer in the classroom and come home to work on the video tutorial to celebrate:

6 Months of Daily Blogging!
Hooray!

Alas, it was not to be. Just like the majority of the things I try to plan in advanced, lol. I had all my materials prepped, planned out a little outline of good pausing points in the process when I could chat and give pointers, and finally figured out how to position my camera for a half decent view. So, I proceed to do one full run in all my dorky glory and made an almost 30 minute video. Yes, that's right. Thirty minutes on how to make one paper crane. I decided to go with an origami tutorial with a side of "How to Get Your Dream Guy/ Girl" as per suggestion. Lol. I was going to split it up into installments I swear! 

(This was neglecting the fact that in order to edit my video, it would have to be converted and my converter program only takes clips that are three minutes or under. That's something I realized about half an hour ago and I started working on this project about seven hours ago.)

Technology, you will be the death of me. *knocks on wood*

I tried three computers to upload the footage from my digital camera (Not the same as a digital camcorder!) All to no avail. It's probably due to the lack of HDMI cable and the fact that my camera is a little beast for making a 30 min. film almost 2 G. Bah, I should have know better from the last time this happened back when I was visiting in Florida. It wasn't as bad as this and eventually worked and turned into my manatee and storm videos. 

So, I do another full run. It was roughly 18 minutes and filmed in two segments. Same problem. Then, I also remember that YouTube is a little picky in that it likes the ten minute videos and one my segments was 11 minutes without any of my planned additive editing.

One of the worst parts of all of this was that the Traditional Origami Crane video was one of many I had hoped to post for today! T_T Once I figure out a better way to do all of this, because the various steps I have to go through is ridiculous, I'll be posting the rest of the videos that I've planned! 

Just a hint, I'm planning another origami tutorial for a flapping crane and a flower!

Well, push came to shove and I wanted a video for today. So, I downgraded the file to the lowest settings possible, rushed my last full run before my battery died on me, and have uploaded this video with no editing. Congrats on witnessing my awkwardness in all its glory. Sorry, lol, I'm just a little sulky about today and bashful about this whole reaching out thing. :D


Like I said, if you have any questions, feel free to message me. This isn't as in depth as I would have liked to make it.

How to get a Square from 8.5"x11" Paper:

 Take the side that I'm pointing to and align it to...

... the side that I'm pointing to here.

Cut off the bottom rectangle to get a square!

Yes, the relationship advice is me being totally honest. And yes, I had talked about all of those tips during my initial video that didn't make it. :( You guys better love me for making one of the most random crafting videos ever. Lol. 

I need to go to bed. Three hours of sleep is a terrible, terrible thing. See you tomorrow and thank you so much for sticking by me or joining in on this simple but quirky adventure. <3

Thursday, March 25

023. Origami Butterfly Tutorial

Here's my attempt at a tutorial for you! I scoured the interwebs for a simple butterfly pattern that was hard even for me to mess up. : ) I always try to be extra thorough with my guides, not condescending. Here we go!
- - - - -
Step 1:
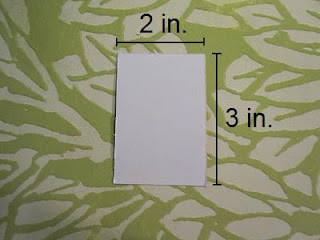
Cut a bi-colored piece of paper 2 inches by 3 inches.
- - - - -
Step 2:
Fold in half horizontally/ downward/ hamburger-style.
- - - - -
Step 3:
Fold in half vertically/ sideways/ hot dog-style.
- - - - -
Step 4:
Open once and fold the top corners to the center line.
- - - - -
Step 5:
Unfold back until this point. You just made score lines for the next steps.
- - - - -
Step 6:
Lift the top layer of one side and tuck the top corner inward.
The first picture is what it looks like when you lift up the left side.
Repeat on the right side.
- - - - -
Step 7:
Lift up the left side again and flatten it to make it your new front.
Flip over and do the same to the backside.
- - - - -
Step 8:
Spin upside-down and fold the inner corners downward just past the line.
Make sure to leave a space at the ends for wing tips.
- - - - -
Step 9:
Unfold what you just did. These are score lines for the next step.
- - - - -
Step 10:
Lift one layer and tuck the inner corner inward. Repeat on the other side.
The top picture is what the right side looks like when lifted.
- - - - -
Step 11:
Pull the top left layer downward and flatten. Repeat on the right side.
 
- - - - -
VoilĂ !
A bona fide butterfly! 
 _ " _ 
 (_\|/_) 
(/|\)
Related Posts Plugin for WordPress, Blogger...